Creating Your First Workspace
How to create your first iTasks workspace: name, timezone, first project, starter task, and preparing the team for work.
A Workspace is your primary and fully isolated operating environment. In iTasks, it’s the "top-level" container: it holds your projects, tasks, team members, and the HelpDesk database. A workspace ensures that data from one company or team is completely separated from another.
How is it different from a project?
- ● Data Isolation: Customer and member information in one workspace is completely inaccessible from any other workspace.
- ● Access Management: You can granularly assign rights to projects within a workspace, but you cannot share data or access directly between different workspaces.
- ● Team Roster: Each workspace has its own independent list of users. Even if the same people work across different teams, they are treated as separate members with independent roles.
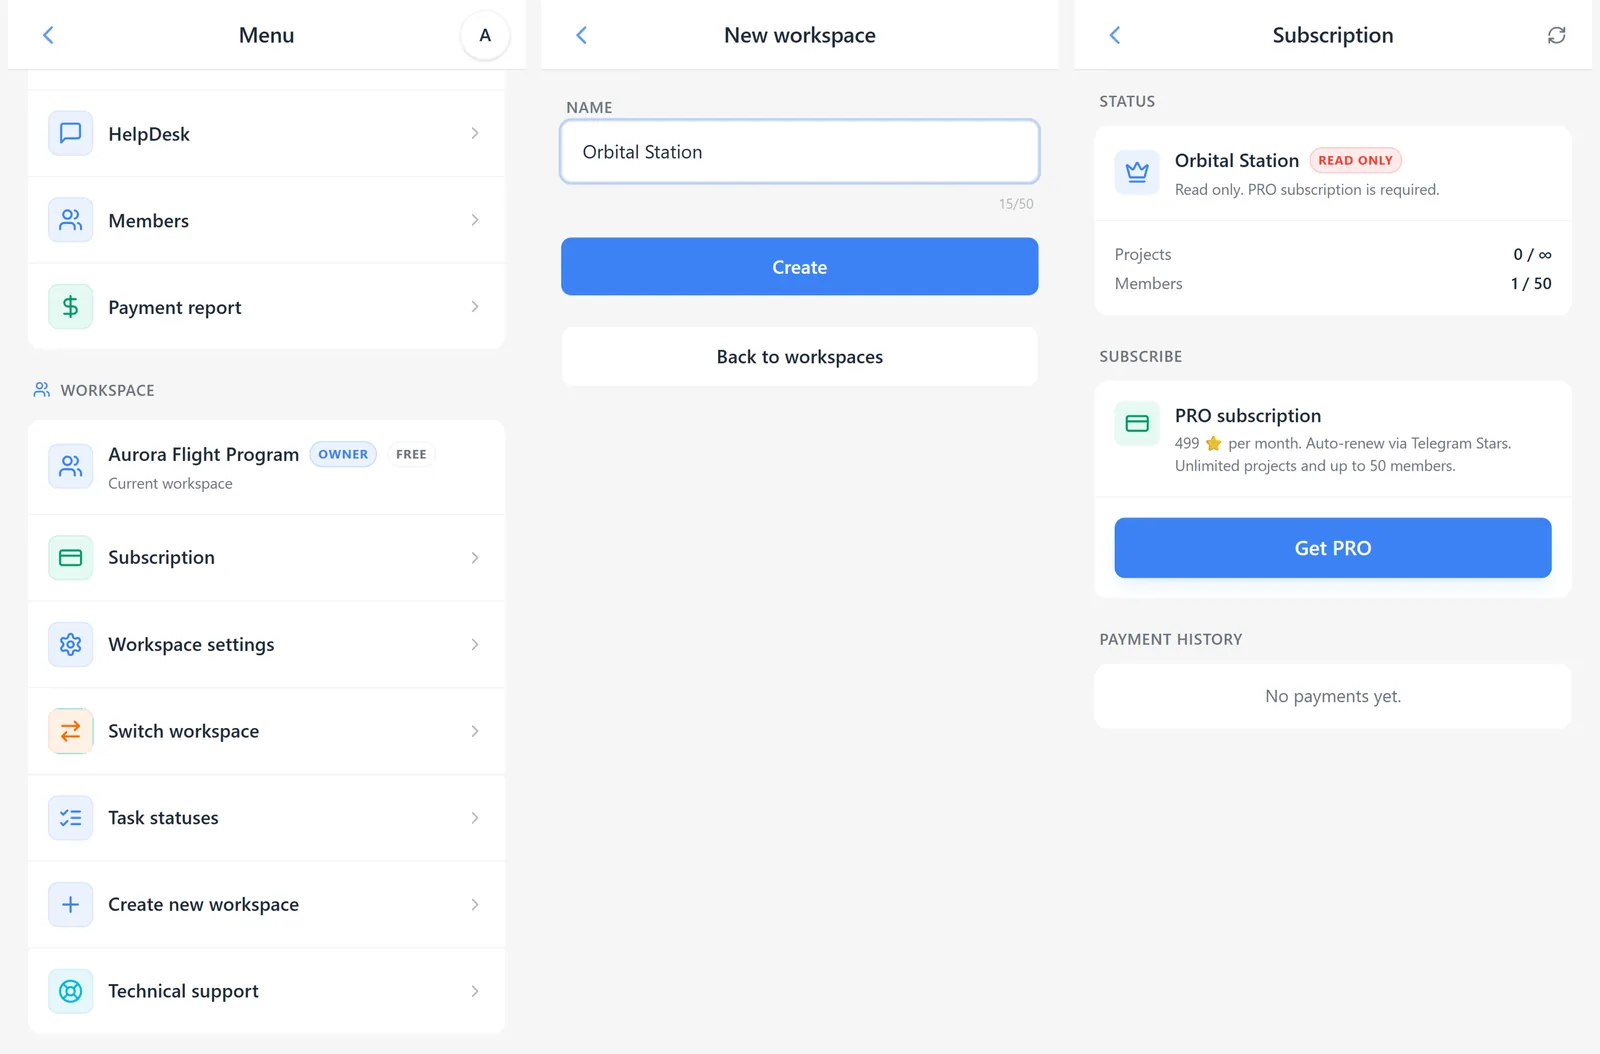
Pricing and Limits: The free plan includes one active workspace with Free limits: 3 members, 1 project, and 1 HelpDesk channel. If PRO expires and the first workspace exceeds those limits, it switches to read-only until the owner activates PRO or removes the extra resources. Any additional workspace also stays in read-only mode until a subscription is activated.
How to create a workspace?
There are two ways to create a workspace.
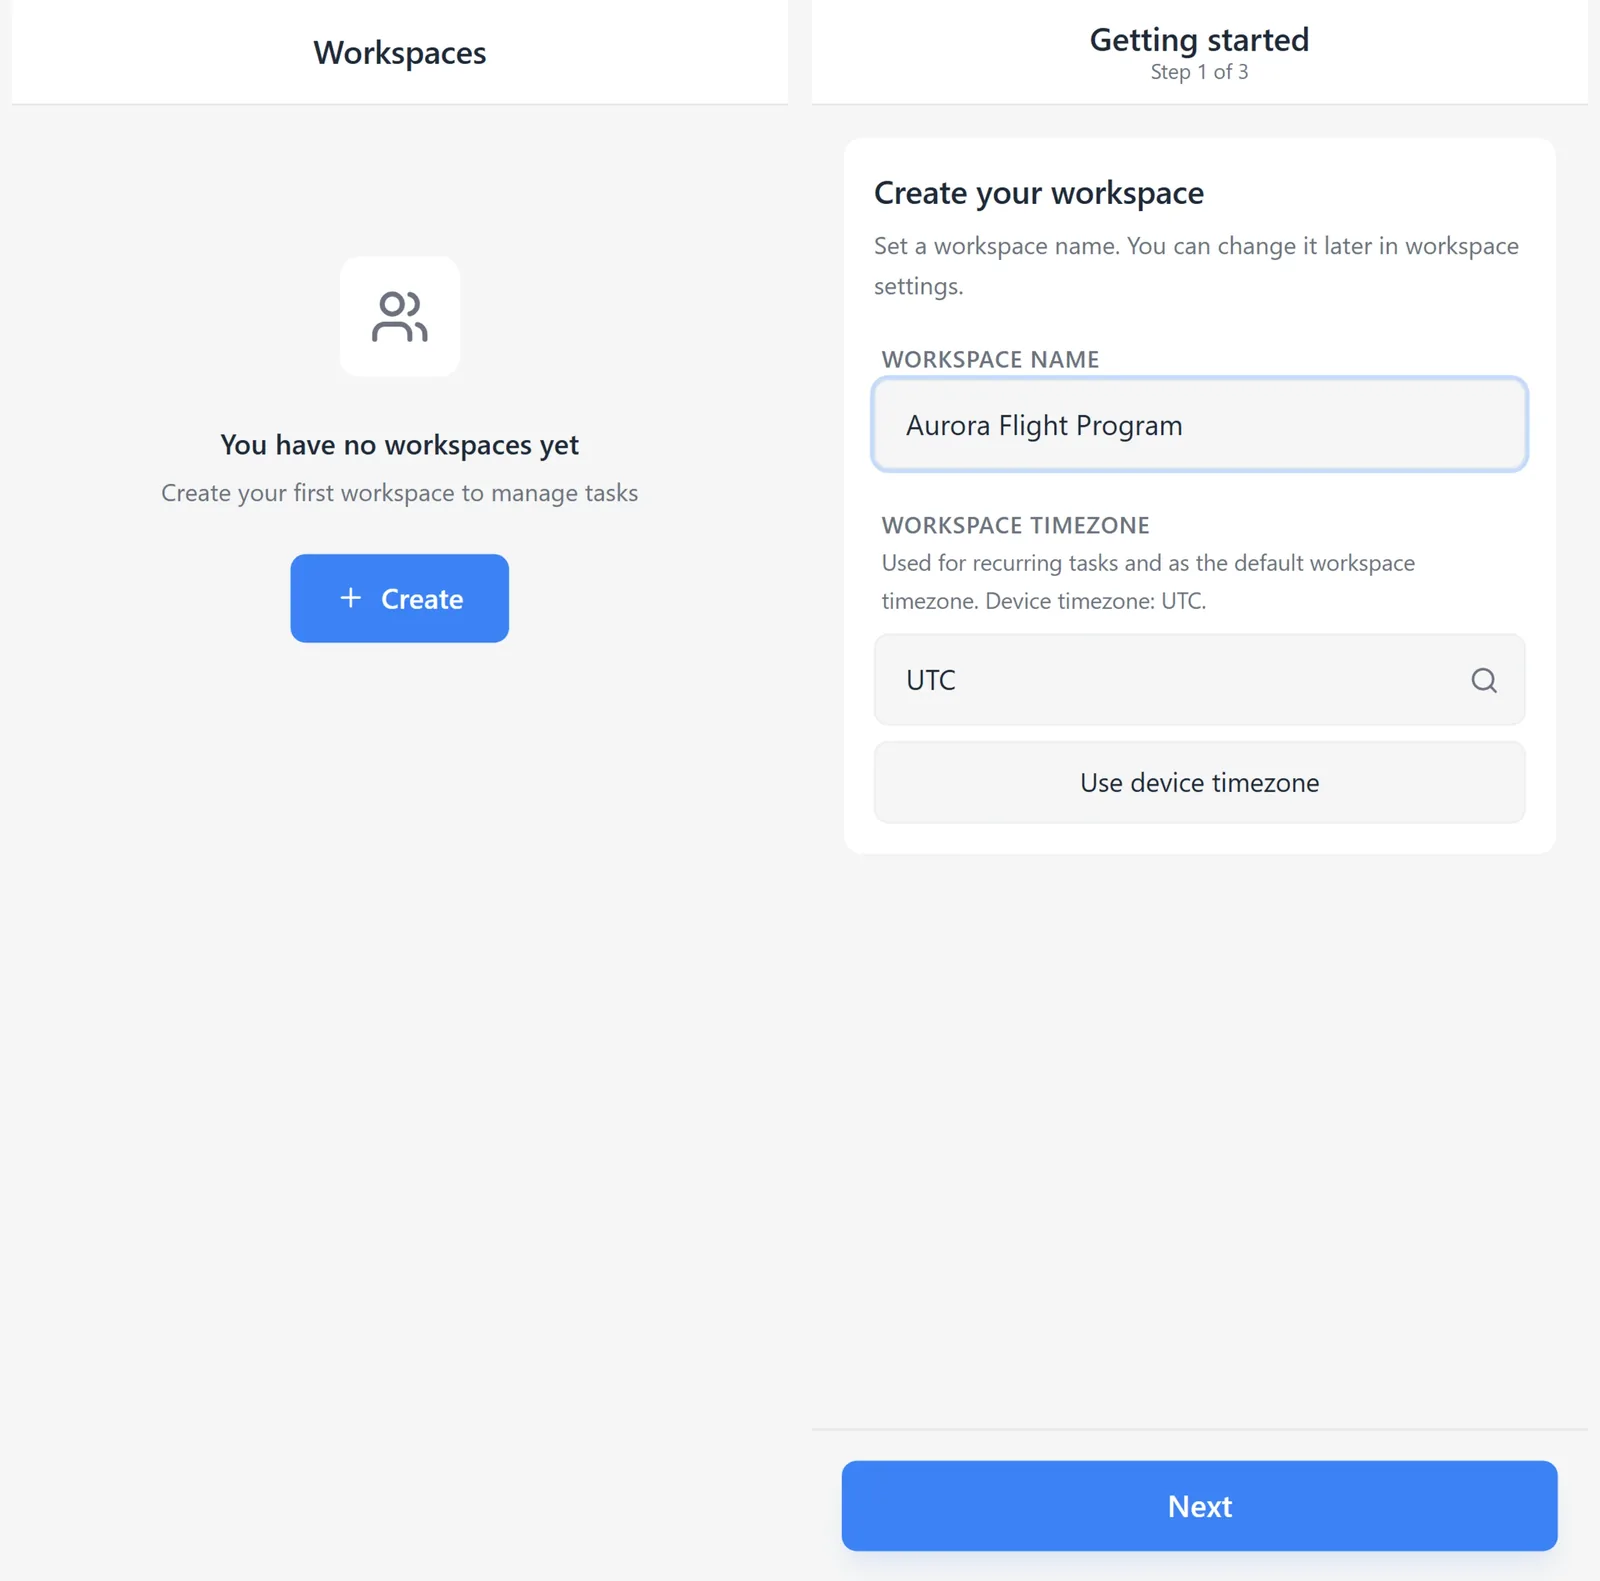
1. Initial Launch (Onboarding)
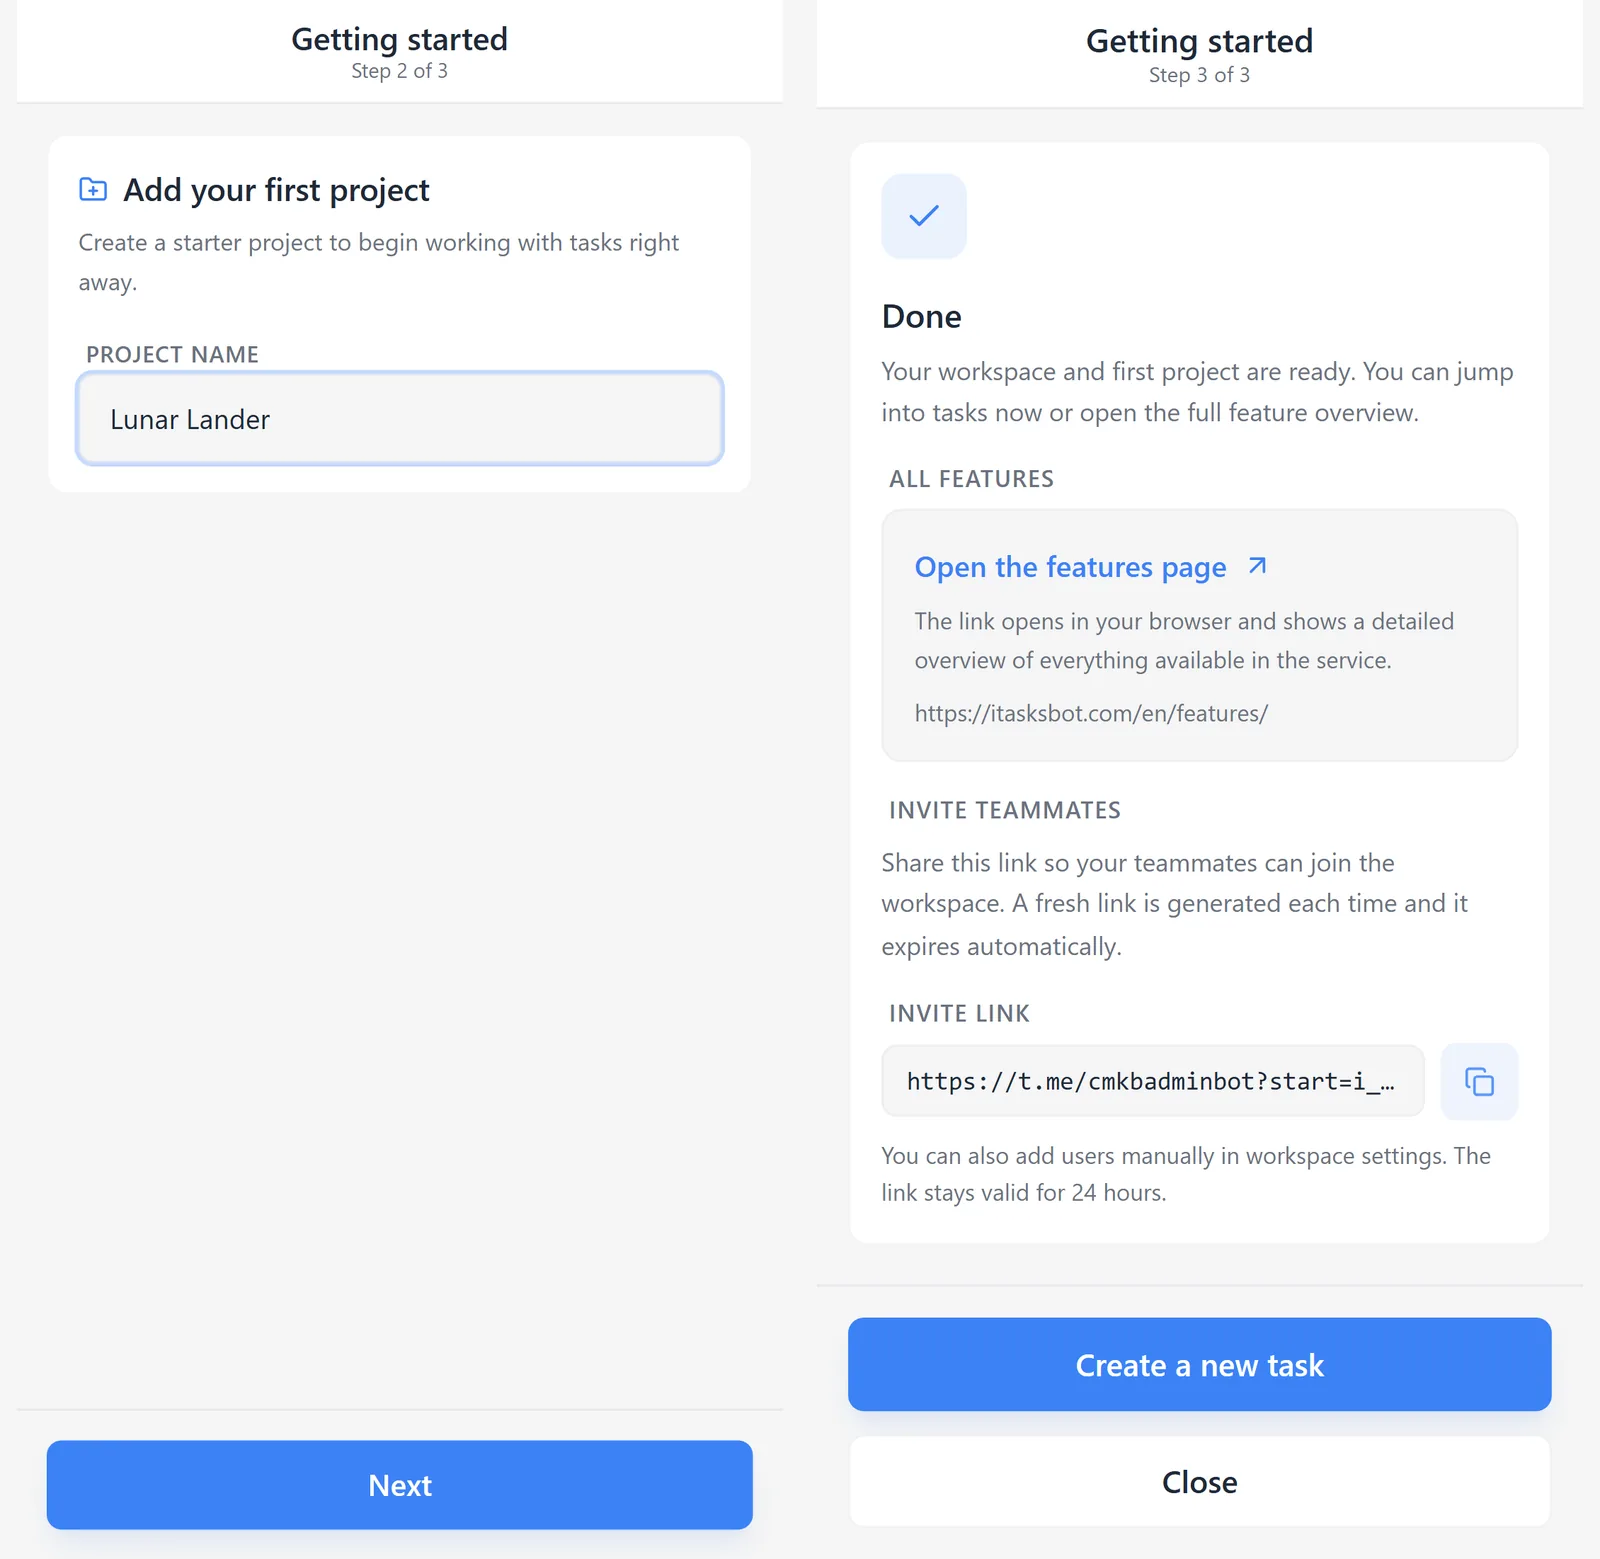
If you open iTasks for the first time and do not have a workspace yet, a short setup wizard appears. It does not show a long task template: you only fill in the basics, and the system creates the starter task on the main screen automatically.
- Workspace name: keep the suggested name or enter the name of your team, product, or company.
- Workspace timezone: choose the timezone used for dates, recurring tasks, and workspace defaults. During onboarding, the same timezone is saved as the owner's personal timezone.
- First project: keep the suggested name or enter the workstream where the first task should appear.
- Finish: iTasks creates the workspace, project, and “First task: Explore system features”, then opens the main screen.
The starter task is not dummy data. It is a short route through the product: it contains links to the key help sections, team-launch checklists, and additional setup areas such as statuses, HelpDesk, and AI access.
2. Via Workspace Menu
If you need to create another workspace (e.g., for a different department), you can do it anytime:
- Click on the current Workspace name in the top-left corner of the home screen.
- Select Create new workspace.
- Enter the name of the new workspace and confirm.
Next step: right after creating a workspace, teams usually invite members, assign roles, and open access to the required projects. Continue with “Inviting Users and Setting Access”.
Related topics
How to open iTasks, sign in through Telegram, and what to do if you see the access restriction screen.
How to choose the current workspace, switch between multiple workspaces quickly, and understand the limits of the free and PRO plans.
The next step after creating a workspace: how to invite users, choose roles, and grant access to the required projects.
What you see on the iTasks home screen, how task view modes work, where the key actions live, and how to navigate the app faster.
Want to try this scenario in the app?
Open iTasks in Telegram now, and come back here when you need a full step-by-step guide.
Open iTasksExplore more features