Selecting and Switching Workspaces
How to choose the current workspace, switch between multiple workspaces quickly, and understand the limits of the free and PRO plans.
When an owner has several workspaces, iTasks shows a dedicated workspace selector. The selected workspace defines which projects, tasks, members, HelpDesk channels, and settings you are working with right now.
In short: one active workspace is available on the free plan with Free limits: 3 members, 1 project, and 1 HelpDesk channel. If the first workspace exceeds Free limits after PRO expires, it becomes Read-only until the owner activates PRO or removes extra projects, members, or channels. Additional workspaces owned by the same user stay in Read-only mode until a PRO subscription is activated for them.
1. What the workspace list shows
Open the workspace switcher from the app header. Each workspace row shows your role and the current plan status.
- FREE - the owner's first free workspace. It works within the free-plan limits.
- Read only - an additional workspace without an active subscription, or the first workspace after PRO expires if it exceeds Free limits. Its data is visible; the owner can activate PRO or remove extra resources to return to Free.
- PRO - a workspace with an active subscription and expanded limits.
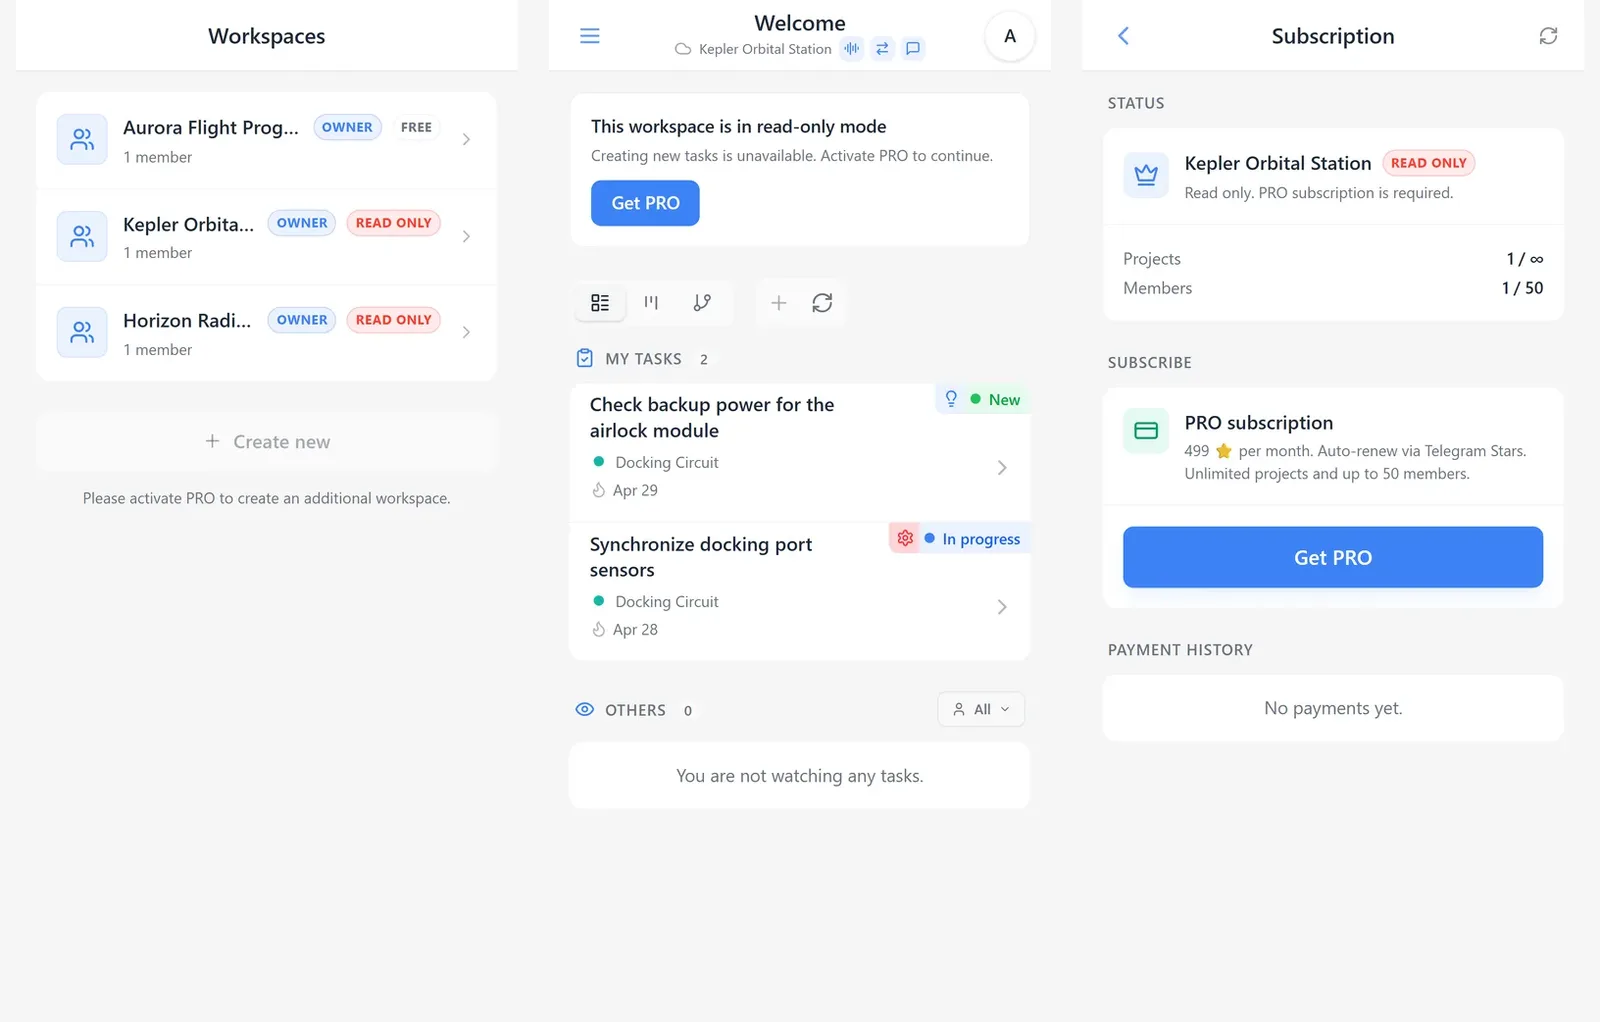
2. How to remove the limitation
In a read-only workspace, the owner sees a banner that opens the subscription screen. After PRO is activated, the workspace becomes fully usable: you can create tasks, projects, members, and HelpDesk settings within the new limits.
For detailed FREE and PRO limits, pricing, payment history, and read-only behavior, use the separate Subscription, Plans, and Limits guide. The key point here is that a subscription applies to one workspace, not to every workspace owned by the user.
3. How to switch after PRO is active
- On the home screen, press the switch-workspace icon next to the current workspace name.
- Select the workspace you need from the list.
- Check the header title: after switching, tasks, projects, and members belong to the selected workspace.
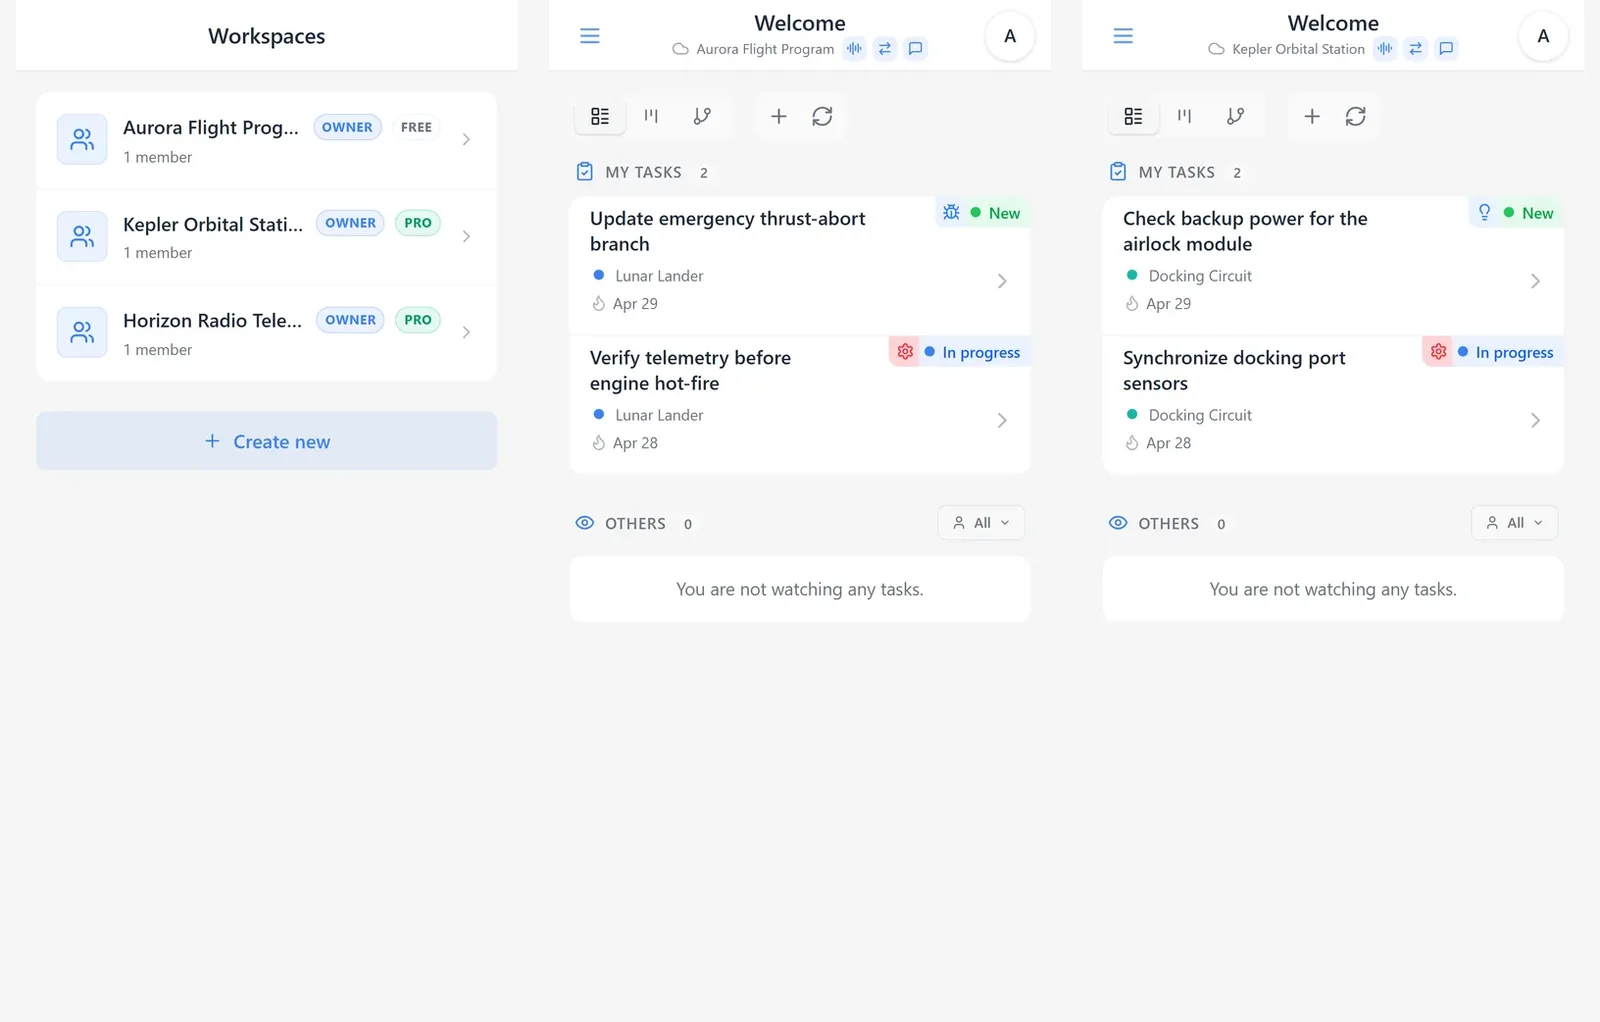
Important: before creating a task, project, or inviting a member, always check the selected workspace in the header. Workspaces are isolated from each other: members and project access are configured separately inside each workspace.
What to read next
If the workspace does not exist yet, start with Creating Your First Workspace. After selecting a workspace, the usual next step is inviting users and setting access. To structure work inside a workspace, use the Projects and Workspace Settings guides.
Related topics
How to open iTasks, sign in through Telegram, and what to do if you see the access restriction screen.
How to create your first iTasks workspace: name, timezone, first project, starter task, and preparing the team for work.
The next step after creating a workspace: how to invite users, choose roles, and grant access to the required projects.
What you see on the iTasks home screen, how task view modes work, where the key actions live, and how to navigate the app faster.
Want to try this scenario in the app?
Open iTasks in Telegram now, and come back here when you need a full step-by-step guide.
Open iTasksExplore more features