Members and Roles
Invitations to a workspace, team membership management, differences between OWNER, ADMIN, and MEMBER, and assigning project access.
In iTasks, team access is managed on two levels: first a user joins the workspace, and then, if needed, gets access to specific projects. This distinction matters because a workspace role and project access affect different things.
In short: add the person to the workspace first, then confirm their role, and only after that grant access to the required projects. If a user is already in the workspace but cannot see a project, the reason is usually project access.
1. How to invite a user to a workspace
Team management lives in Administration → Members. This screen is available only to workspace owners and admins.
Option 1. Invite link
- Open Members.
- Find the invite link block at the top of the screen.
- Press the copy button and send the link to the user.
- The user opens the link and joins the workspace: Telegram Mini App copies a Telegram link, while Android and iOS apps copy a mobile app link.
The link appears automatically when the screen opens. If a valid link was already created during the current app session, the same link is reused; the copy button only copies the ready value. In Telegram Mini App the interface shows a Telegram bot link, while Android and iOS apps show a link.itasksbot.com link for opening the installed app.
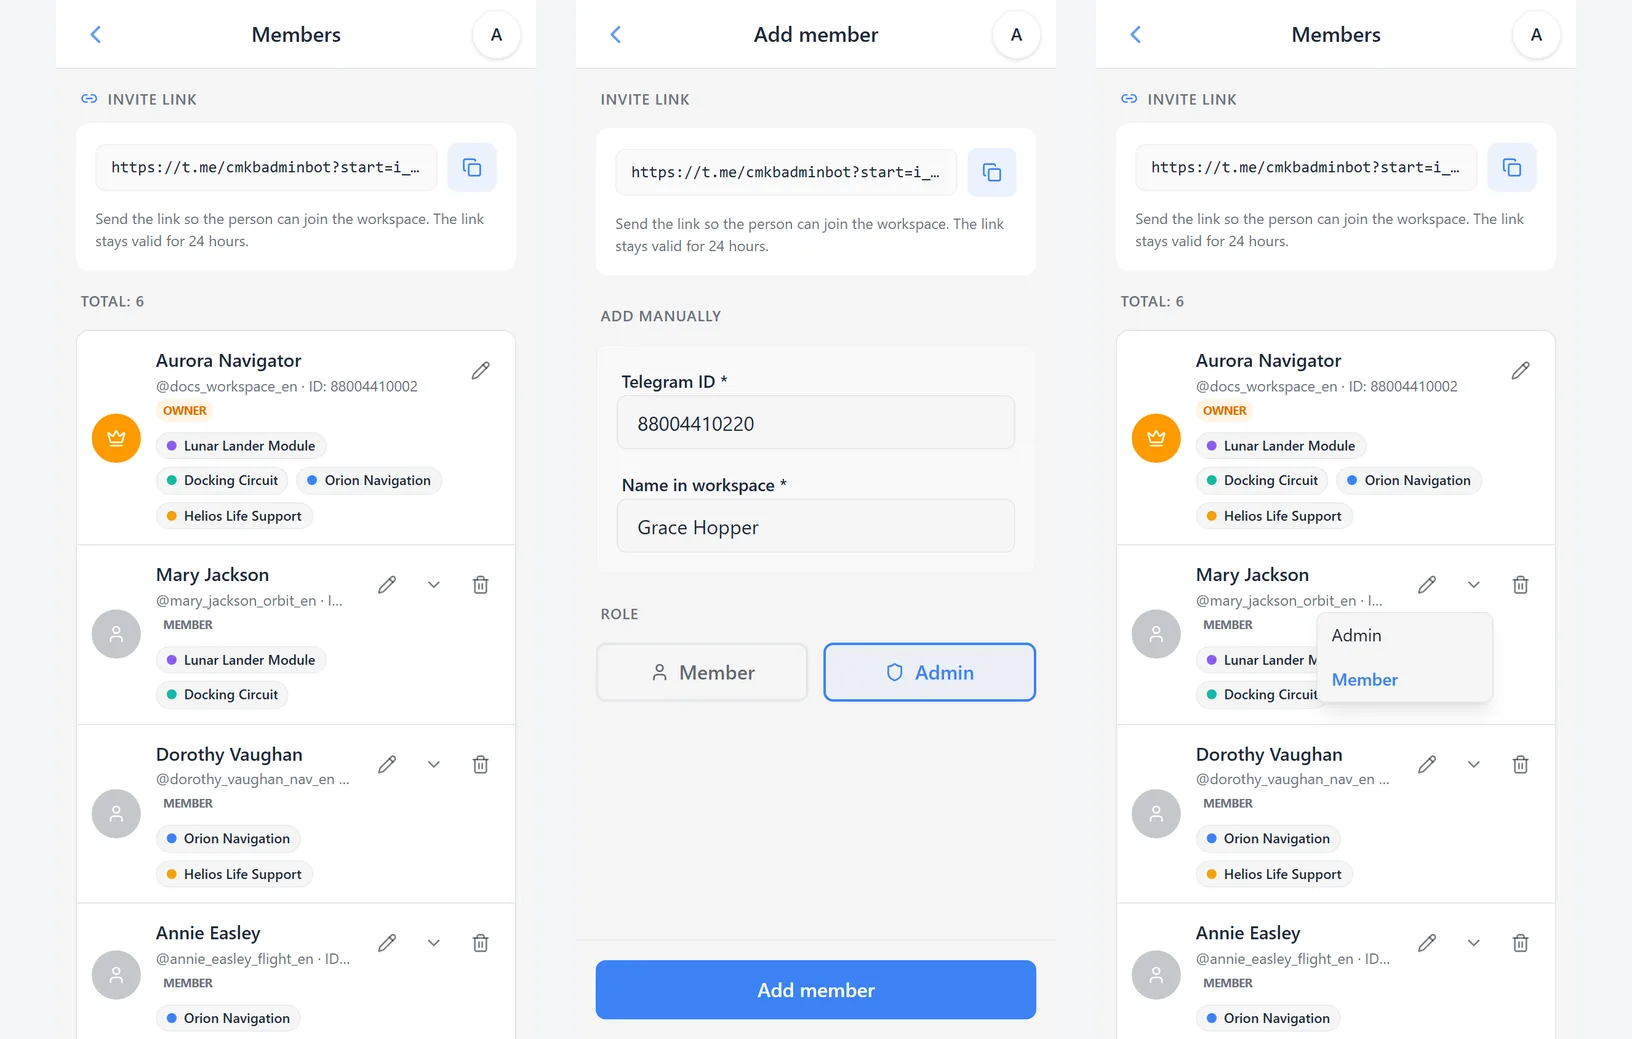
Option 2. Manual addition by Telegram ID
- On the Members screen, tap Add member.
- Choose the Manual add scenario.
- Enter the user's Telegram ID.
- Specify the name that should be shown inside the workspace.
- Select the role right away: Member or Admin.
- Save the changes.
This method is useful when you already know the user's Telegram ID and want to set their name and role immediately without waiting for them to join via a link.
Important: after an invitation or manual addition, the member does not get access to any existing project by default. This is intentional for security reasons: project access is granted separately.
2. Workspace roles and what they affect
There are three workspace roles: OWNER, ADMIN, and MEMBER. They define who can manage the team and the shared workspace settings.
- ● OWNER: full control. A workspace can have only one owner. The owner can invite and remove members, change roles, manage workspace settings, handle subscription actions, and delete the workspace itself.
- ● ADMIN: can invite and remove members and work with settings and projects, but cannot change roles and cannot remove the owner or another admin.
- ● MEMBER: a regular workspace participant. Works only inside the projects available to them and does not manage the team roster.
The practical takeaway:
- A role does not replace project access. A user may belong to the workspace and still not see some projects.
- OWNER and ADMIN always have access to all workspace projects. They cannot be disabled with a project-level toggle.
- Only the OWNER can change another member's role. This is done directly from the members list.
- Ownership cannot be granted or transferred to another member yet. In the current version a workspace always has a single owner; ownership transfer may be added later.
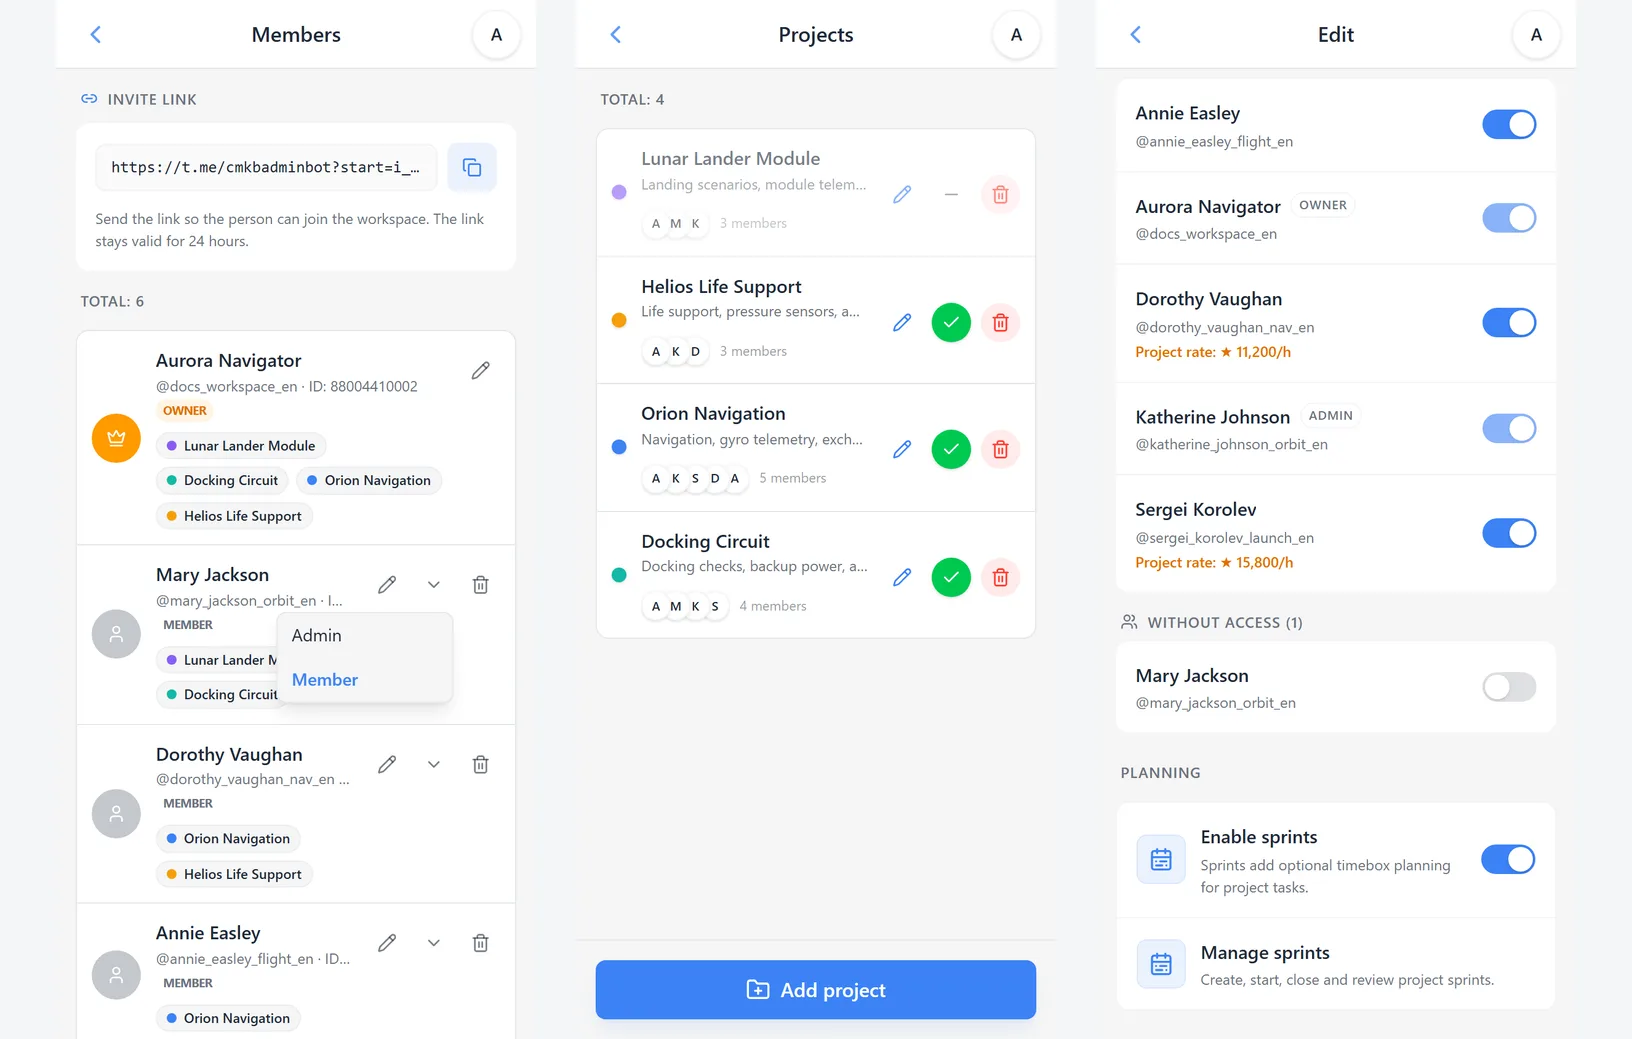
3. How to add a member to one or more projects
Project access is configured inside the project itself, not inside the member card. This is a separate step after adding the person to the workspace.
- Open the app side menu.
- Go to Administration → Projects.
- Find the required project in the list and tap the pencil icon to edit it.
- On the edit screen, scroll down to the Project Members block.
- Use the toggles in the With access and Without access lists to decide who should see the project.
- Tap Save changes.
You can also open the broader guide on the Projects page.
The access model is now the same for both existing and newly created projects: creating a project does not automatically grant access to regular members. Workspace owners and admins keep their administrative access, while everyone else must be explicitly enabled through the Project Members block.
What to remember
- ● If a user is in the workspace but cannot see a project's tasks, first check whether they are included in that project's member access list.
- ● OWNER and ADMIN stay in every project automatically and cannot be manually turned off there.
- ● The same user may have access to only part of the projects inside one workspace.
Final access logic
- Add the user to the workspace.
- Assign the correct workspace role.
- If needed, grant access only to the required projects.
This sequence helps avoid the common situation where a person is already listed in the team but still cannot see the project or perform the expected action.
Related topics
How to create projects in iTasks, manage their names, colors, and settings, and build a clear project structure inside a workspace.
Timezone, invite link, AI API, storage, members, JSON export, and workspace deletion.
How a workspace owner connects AI assistants to iTasks with a connection link, MCP URL, Bearer protection, and ready Codex CLI / Claude Code prompts.
How to tailor task statuses to your workflow, reorder process stages, and understand how those changes appear in task cards and boards.
FREE, PRO, and read-only mode, workspace limits, card payment in the website account or Telegram Stars in the app, and what happens after expiration.
Want to try this scenario in the app?
Open iTasks in Telegram now, and come back here when you need a full step-by-step guide.
Open iTasksExplore more features