Projects
How to create projects in iTasks, manage their names, colors, and settings, and build a clear project structure inside a workspace.
Projects separate work inside one workspace by direction, product, module, team, or technical area. A workspace can contain several projects, while regular members can be given access only to the projects they actually work on.
In short: a project controls its name, color, active state, member access, optional sprints, and project-specific rates. A workspace role does not replace project access: regular members must be added to projects explicitly.
1. Where to find projects
Open the app menu and go to Administration → Projects. The screen shows the total project count, color marker, description, members, edit action, active-state control, and delete action.

2. How to create a project
- Tap Add project.
- Enter a name. Keep it short because it appears in task cards and filters.
- Add a description if the project purpose needs clarification.
- Select a color. It helps distinguish projects in lists, Kanban, and the project view.
- Save the project.
After creation, check member access. Owners and admins keep administrative access, but regular members must be enabled explicitly. The broader role model is described in Members and Roles.
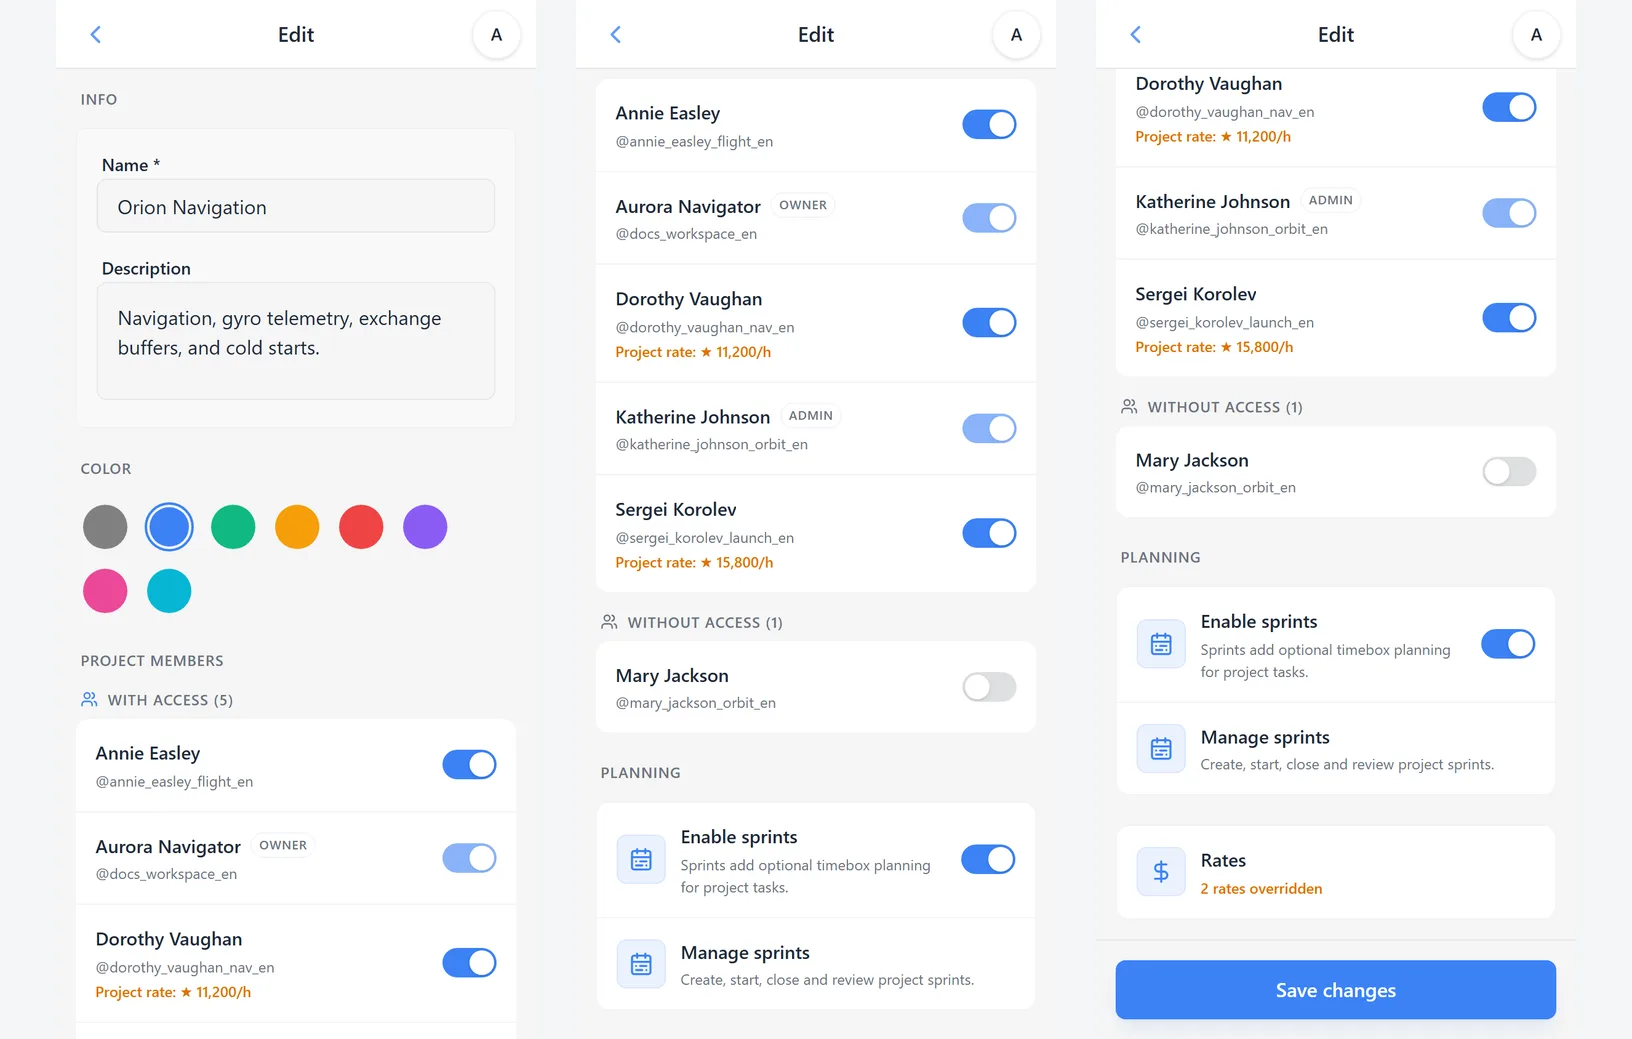
3. What can be configured inside a project
The project edit screen contains the main project settings and workflow options:
- Name and description - shown in project lists and used to explain the direction to the team.
- Color - used as a visual marker in task cards, filters, and main-screen views.
- Active state - an inactive project stays in the database and history but is easier to keep out of daily work.
- Project members - lists people with and without access. OWNER and ADMIN cannot be turned off manually inside a project.
- Sprints - optional timebox planning for the project. Creating, filling, and starting sprints is covered in Sprints and Planning.
- Rates - the owner can override member rates for a specific project when payment reports need that detail.
4. Projects and tasks
When creating or editing a task, the user selects a project. This affects available members, filtering, Kanban display, and the project view. If a project represents a large workstream, you can build related tasks and subtasks inside it; the main-screen guide explains the general screen behavior and hierarchy: Main Screen.
5. Limits and permissions
The number of available projects depends on the workspace plan state. If the first workspace exceeds the Free limit after PRO expires, projects cannot be created or changed, but the owner can delete extra projects to return the workspace to Free. In other read-only cases, existing data remains available for viewing and export. See Subscription, Plans, and Limits for details.
What to read next
After setting up projects, check member access, configure custom task statuses, and review workspace settings if needed.
Related topics
Invitations to a workspace, team membership management, differences between OWNER, ADMIN, and MEMBER, and assigning project access.
Timezone, invite link, AI API, storage, members, JSON export, and workspace deletion.
How a workspace owner connects AI assistants to iTasks with a connection link, MCP URL, Bearer protection, and ready Codex CLI / Claude Code prompts.
How to tailor task statuses to your workflow, reorder process stages, and understand how those changes appear in task cards and boards.
FREE, PRO, and read-only mode, workspace limits, card payment in the website account or Telegram Stars in the app, and what happens after expiration.
Want to try this scenario in the app?
Open iTasks in Telegram now, and come back here when you need a full step-by-step guide.
Open iTasksExplore more features