Sprints and Planning
How to enable sprints for a project, create a short planning cycle, fill it with backlog and active tasks, then start or close the sprint.
Sprints and Planning
A sprint is a short working cycle inside a project. It helps collect the next period of work, keep it separate from the broader task flow, and show how much is done, how much remains, and what outcome the team is aiming for.
In short: enable sprints in project settings, create a planned sprint, add tasks from backlog and active work, then start it. A project can have only one active sprint at a time.
1. Enable sprints for a project
Open Menu → Administration → Projects, choose the project, and turn on Sprints. The project then appears on the sprints screen, and the task form can offer sprint selection.
Project settings are managed by the workspace owner and admins. Regular members work with tasks in the projects they have access to.
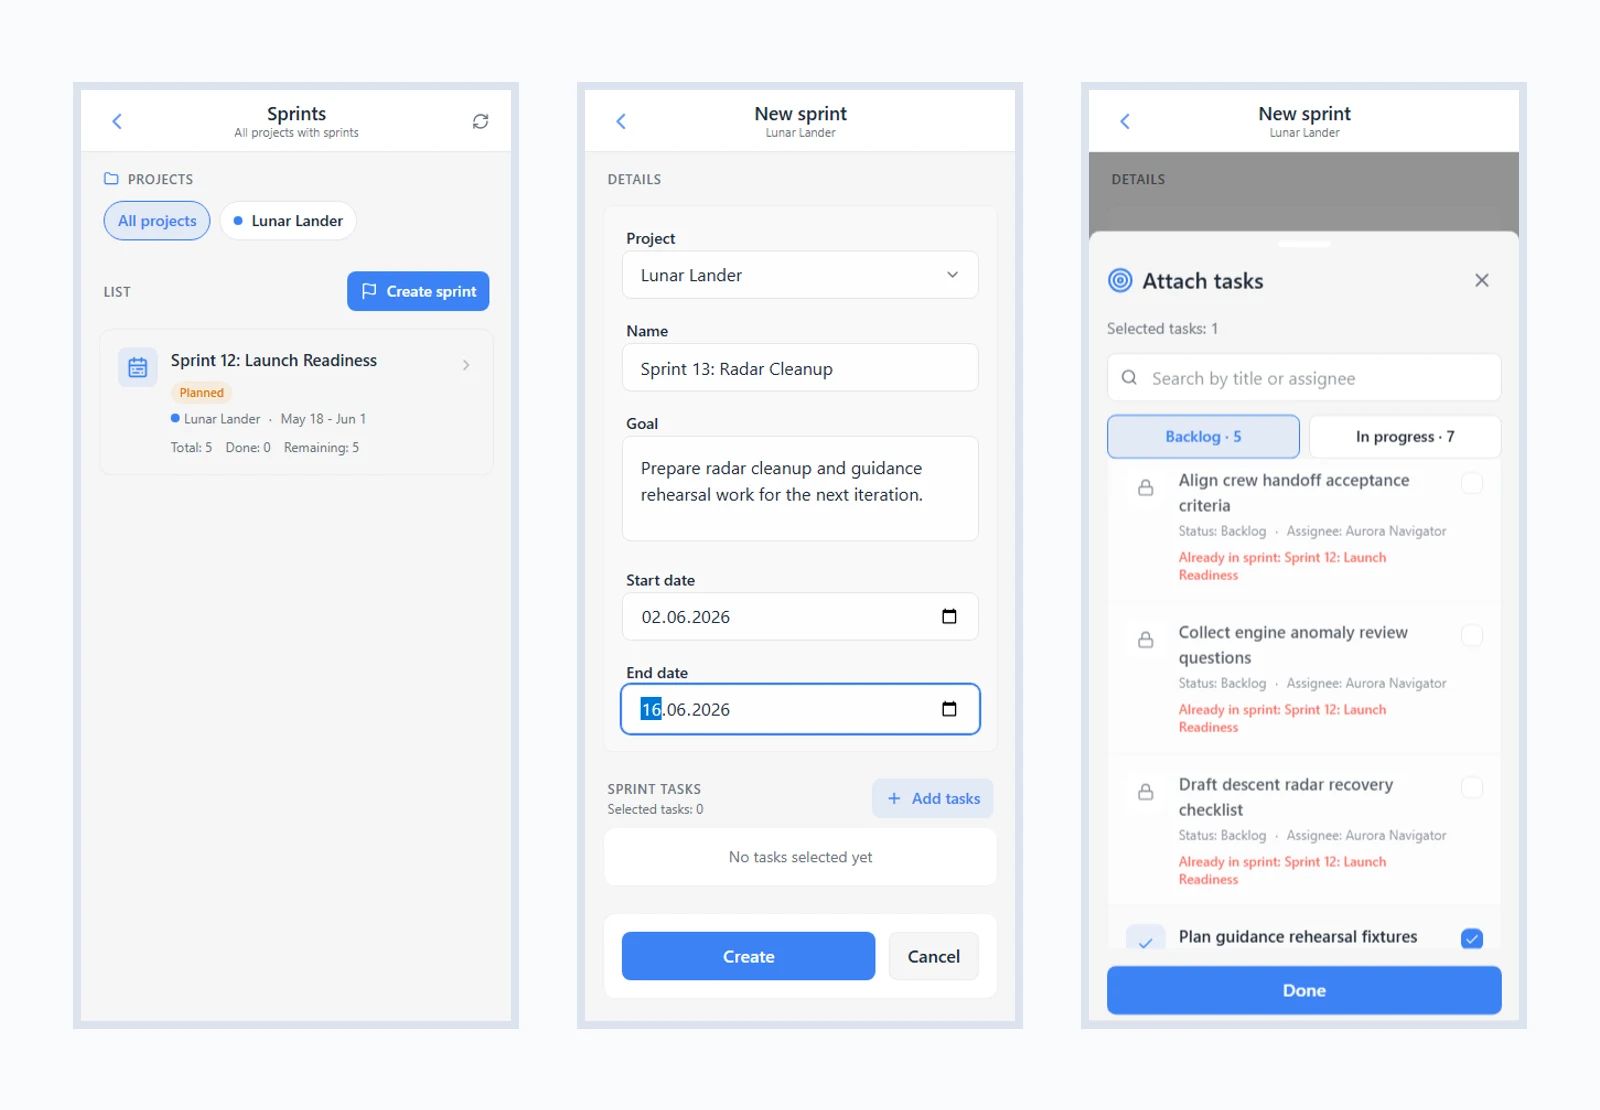
2. Create a sprint
- Open Menu → Sprints.
- Select a project if the workspace has several projects with sprints enabled.
- Press Create sprint.
- Enter a clear name, goal, start date, and end date.
- Add tasks before saving, or create an empty plan and fill it later.
Keep the name short and recognizable, for example “Sprint 12: Launch Readiness”. The goal should describe the outcome of the sprint, not just repeat the task list.
3. Fill it with tasks
Add tasks opens the project task picker. It has two tabs: Backlog for deferred tasks and In progress for tasks already in active statuses. Search helps find the right card by title.
Sprints contain root tasks from the project. Subtasks follow their parent task and are not selected separately. If a task already belongs to another sprint, it is shown as unavailable so the team plan stays clear.
Backlog tasks stay in backlog while the sprint is planned. When the sprint starts, iTasks moves those tasks into a working status so they appear in the main flow.
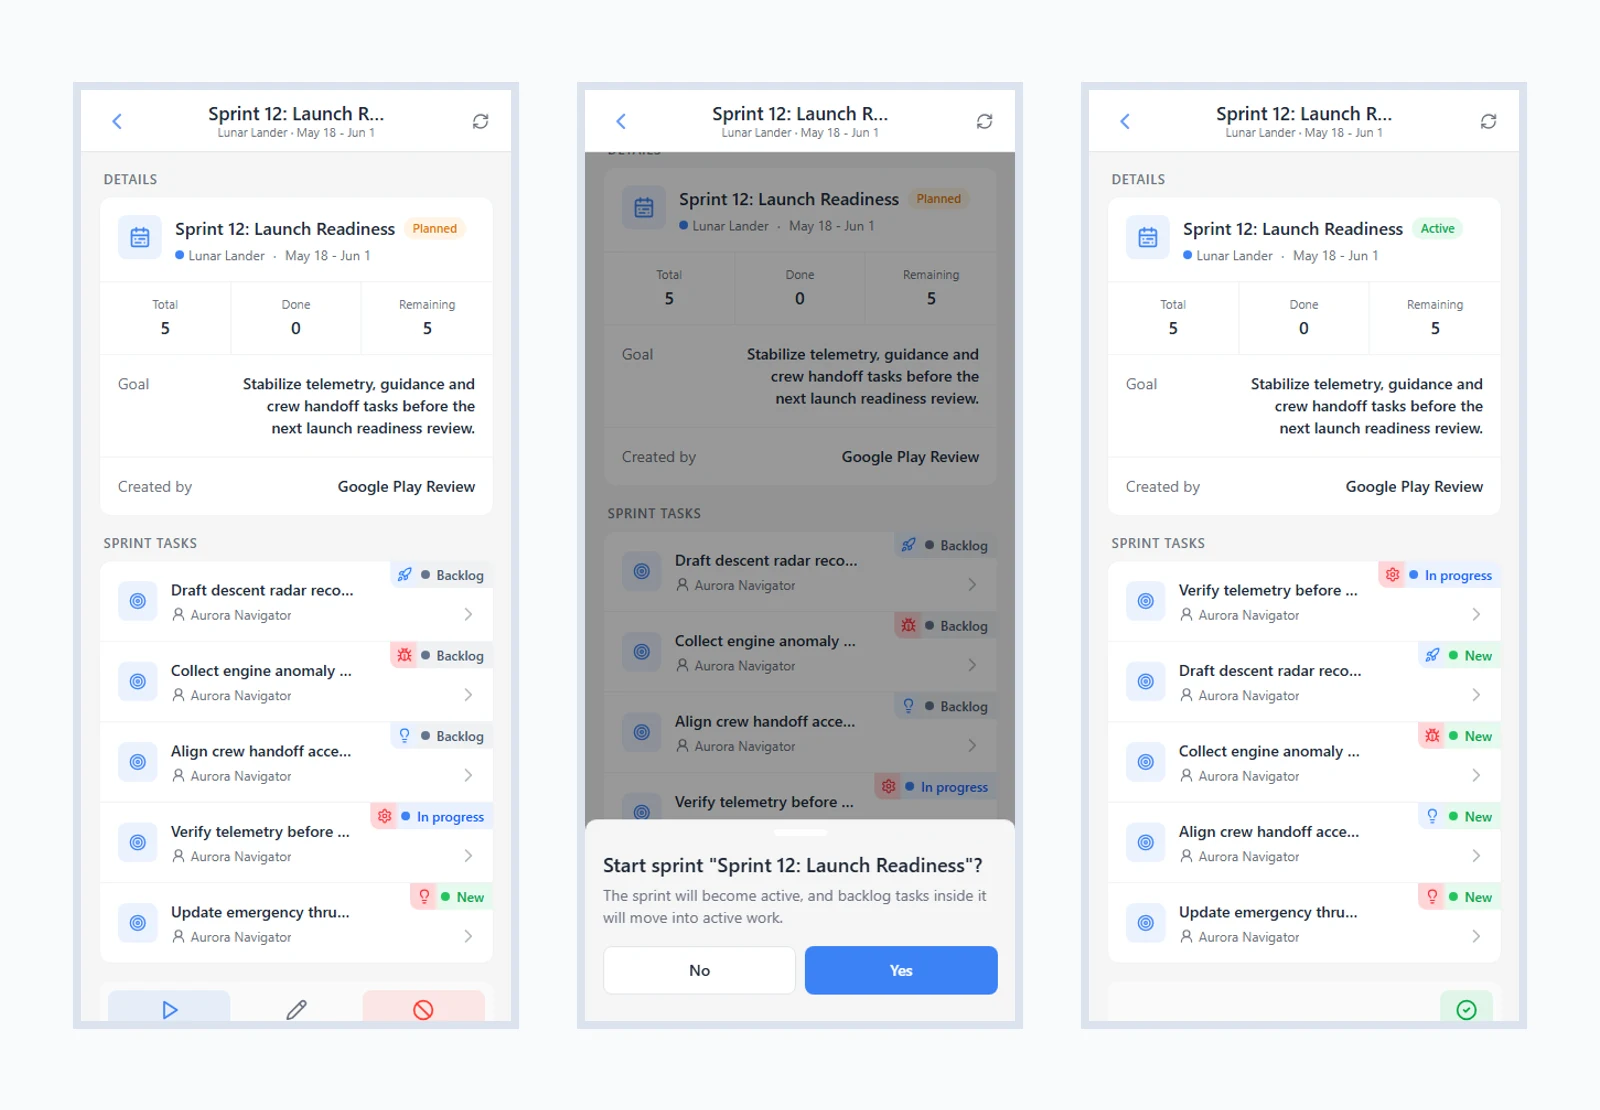
4. Start the sprint
Open the planned sprint details screen and press Start. After confirmation, the sprint becomes active and backlog tasks move into a working status. If the project already has an active sprint, a new one cannot start until the current sprint is closed.
The sprint card shows the goal, creator, dates, task list, and counters for Total, Done, and Remaining. Selecting a task opens its task details screen.
5. Work during the sprint
During a sprint, the team works with tasks as usual: changing statuses, adding comments, files, subtasks, and time entries. The sprint remains the planning context and is visible on the task card.
A planned sprint can be edited: goal, dates, and task composition can change before launch. New tasks can be added to an active sprint from the task form through the Sprint field when they really belong to the current cycle.
6. Close or cancel
An active sprint can be closed when the team finishes the cycle or wants to capture the result. Closing detaches current tasks from the sprint, but it does not complete the tasks automatically: unfinished work stays in its current status.
A planned sprint can be canceled before it starts. Its tasks are also detached from the sprint and remain in the project.
Related Guides
Before planning, it helps to groom the Backlog. Project setup and enabling sprints are covered in Projects. The sprint field in the task form is shown in Creating and Editing a Task, and daily task views are covered in Task View Modes.
Related topics
How to use backlog for ideas and non-urgent tasks, then move them into active work at the right time without losing priorities.
How to search tasks by text, jump to the right result quickly, and use search as a fast entry point into your daily work.
How to configure workflows in iTasks: process steps, task routes, automatic status movement, and rules that keep team work predictable.
How to log time in iTasks tasks, review time history, capture actual effort, and track team workload using real data.
Where to review completed tasks, time reports, and overall team activity so you can measure progress, workload, and results over time.
How to open an iTasks voice room, invite workspace members, and use voice collaboration for quick team discussions without leaving Telegram.
Want to try this scenario in the app?
Open iTasks in Telegram now, and come back here when you need a full step-by-step guide.
Open iTasksExplore more features